Quick Start Guide
In this guide
-
What Spark, Flare and Halo are and the relationship between them
-
Everything required to set-up your machine
-
How to create a new automation project and run your first example test, sending your results to Halo
-
How to navigate and optimise your organisation's Halo environment
-
How to start testing your own applications
Introducing Test Evolve - Spark, Flare and Halo
| Spark | Flare | Halo |
|---|---|---|
| Engine A Ruby gem and Node package that bring tools such as Cucumber and Selenium together with a powerful configuration layer. | Studio Application A cross-platform desktop application that allows users to select, configure, execute and view reports on their test scenarios all in one place. | Real Time Test Result Reporting Platform Hosted in the cloud, allowing you to group and share test results with users in your organisation. |
Step 1. Setting up your machine
1a) Installing Ruby and/or Node.js
Test Evolve Spark supports the use of Ruby, Javascript or TypeScript for test development. Follow our guides on installation and setup for either Ruby and/or Node.js based on your team preference. If you are unsure, we recommend beginning with Ruby for new starters.
1b) Installing your IDE/code editor of choice
Next, you'll need an IDE or code editor in order to refactor recorded tests or to write tests directly with Ruby, JavaScript or TypeScript. We recommend the use of Rubymine for Ruby and Visual Studio Code for JavaScript or TypeScript.
Step 2. Setting up Halo and Flare
2a) Register a new Halo Organisation
The chances are, that if you are here, you have already registered your own Halo domain and if so, can skip this step. If you haven't, please visit our Halo sign up page to create a Halo domain for your organisation.
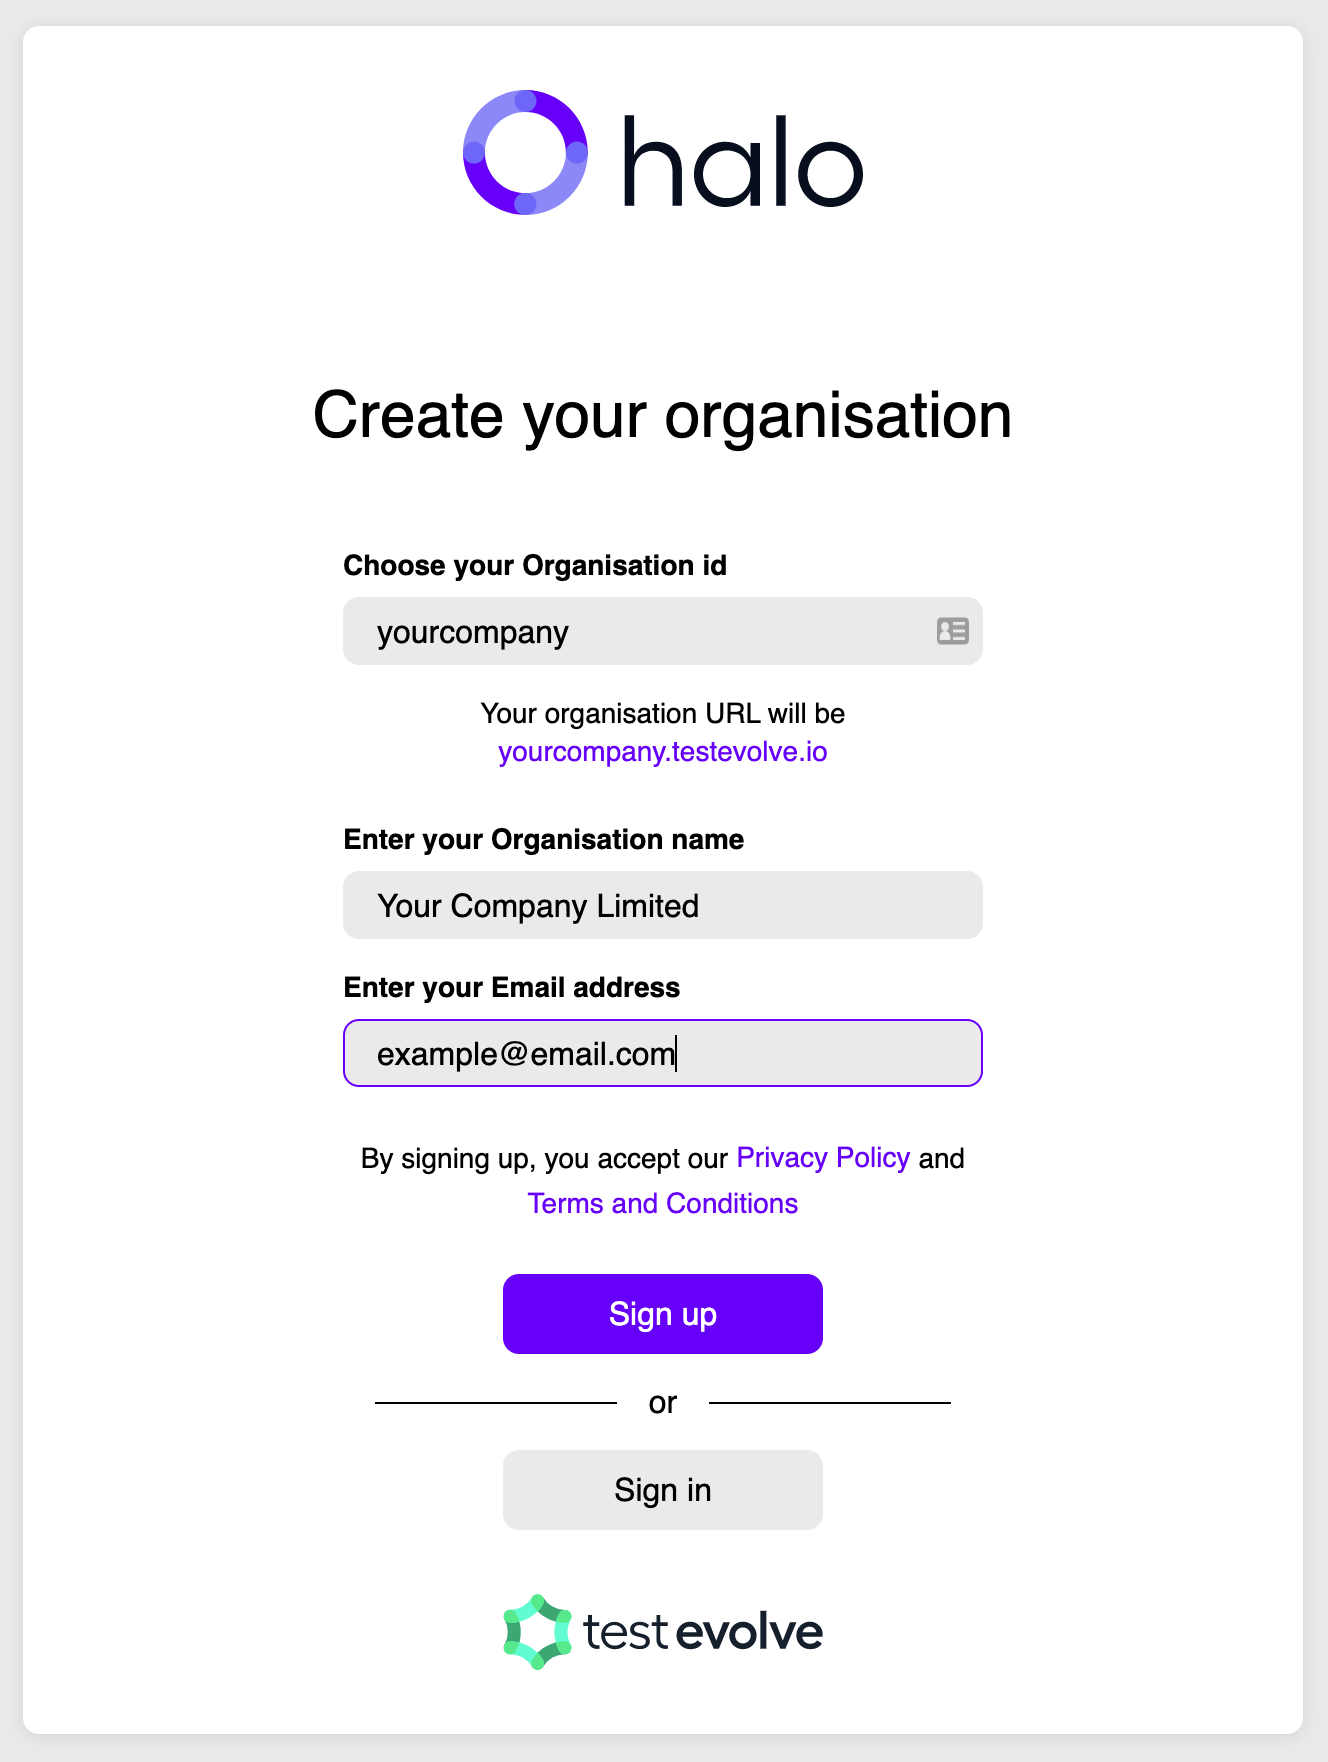
Choose an 'id' for your organisation. You can see the generated URL in a preview to help you decide. Add your organisation name and a valid email address.
The email used will be sent a registration token and will also be established as the first domain administrator with permissions to invite other people. Ensure you have access to the mailbox for that email address.
2b) Download and Install Flare
Follow this guide to Download and Install Flare. Flare is used to Create and Open projects and to record and run your first test.
2c) Create an API Key to push test results to Halo
In order to push your test results to your Halo real-time reports environment, follow this guide to create your API keys.
2d) Finding your way around in Halo and optimising your project layout
i) Managing Projects
Halo supports multiple projects per organisation. Learn how to manage your projects.
ii) Setting up your hierarchy
Halo's incredibly flexible data hierarchy means you can fully customise your project navigation and test result layout to your project's needs. Find out how here.
iii) Inviting and Registering New Users
Learn how to invite new users and how invited users complete their registration.
Step 3. Creating a new project and running your first tests
3a) Create a new project
Simply open Flare and sign in with the same credentials that you registered for Halo. You can now create a new project with a name, location and development language of your choice.
3b) Running an example test and publishing results to Halo
A new Test Evolve Spark project in either Ruby, JavaScript or TypeScript, comes pre-loaded with some example tests in order for new users to be able to run something immediately and also get an initial view of the underlying code used to drive it.
Tests can be executed via Flare, via the IDE or via the command line.
From Flare
After having opened a project or recording a test, you will see the features selection page. Select which Features and Scenarios you wish to run.
Click next to then define your runtime configuration options for these tests and next again to choose your reporting options and run your tests.
Follow this guide to enable your Halo test result reporting.
From your IDE (Rubymine)
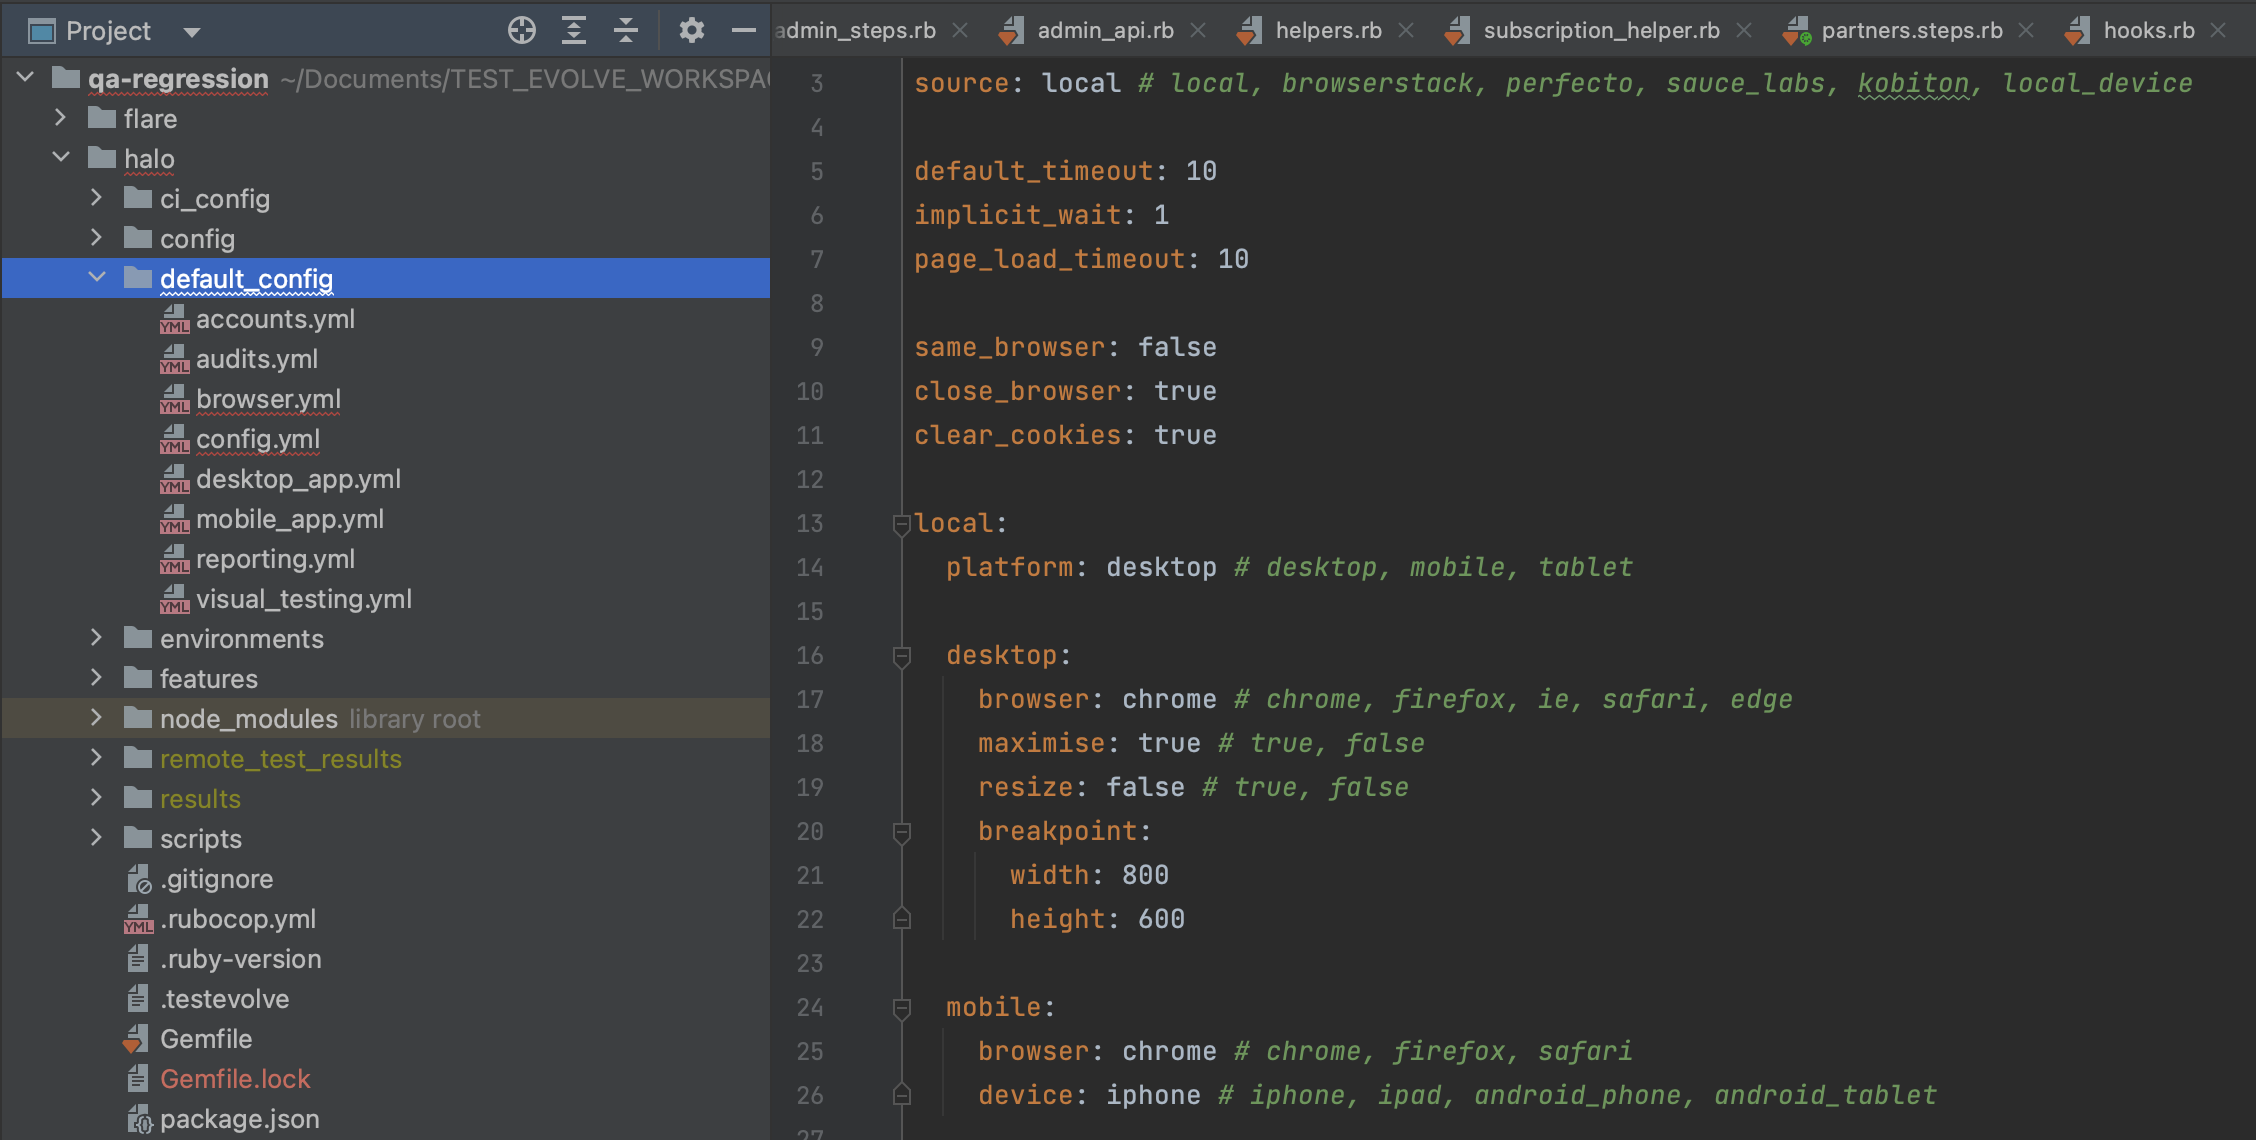
When running tests from the IDE or the command line, the various configurable options that will apply can be found in a range of .yml files in the default_config directory.
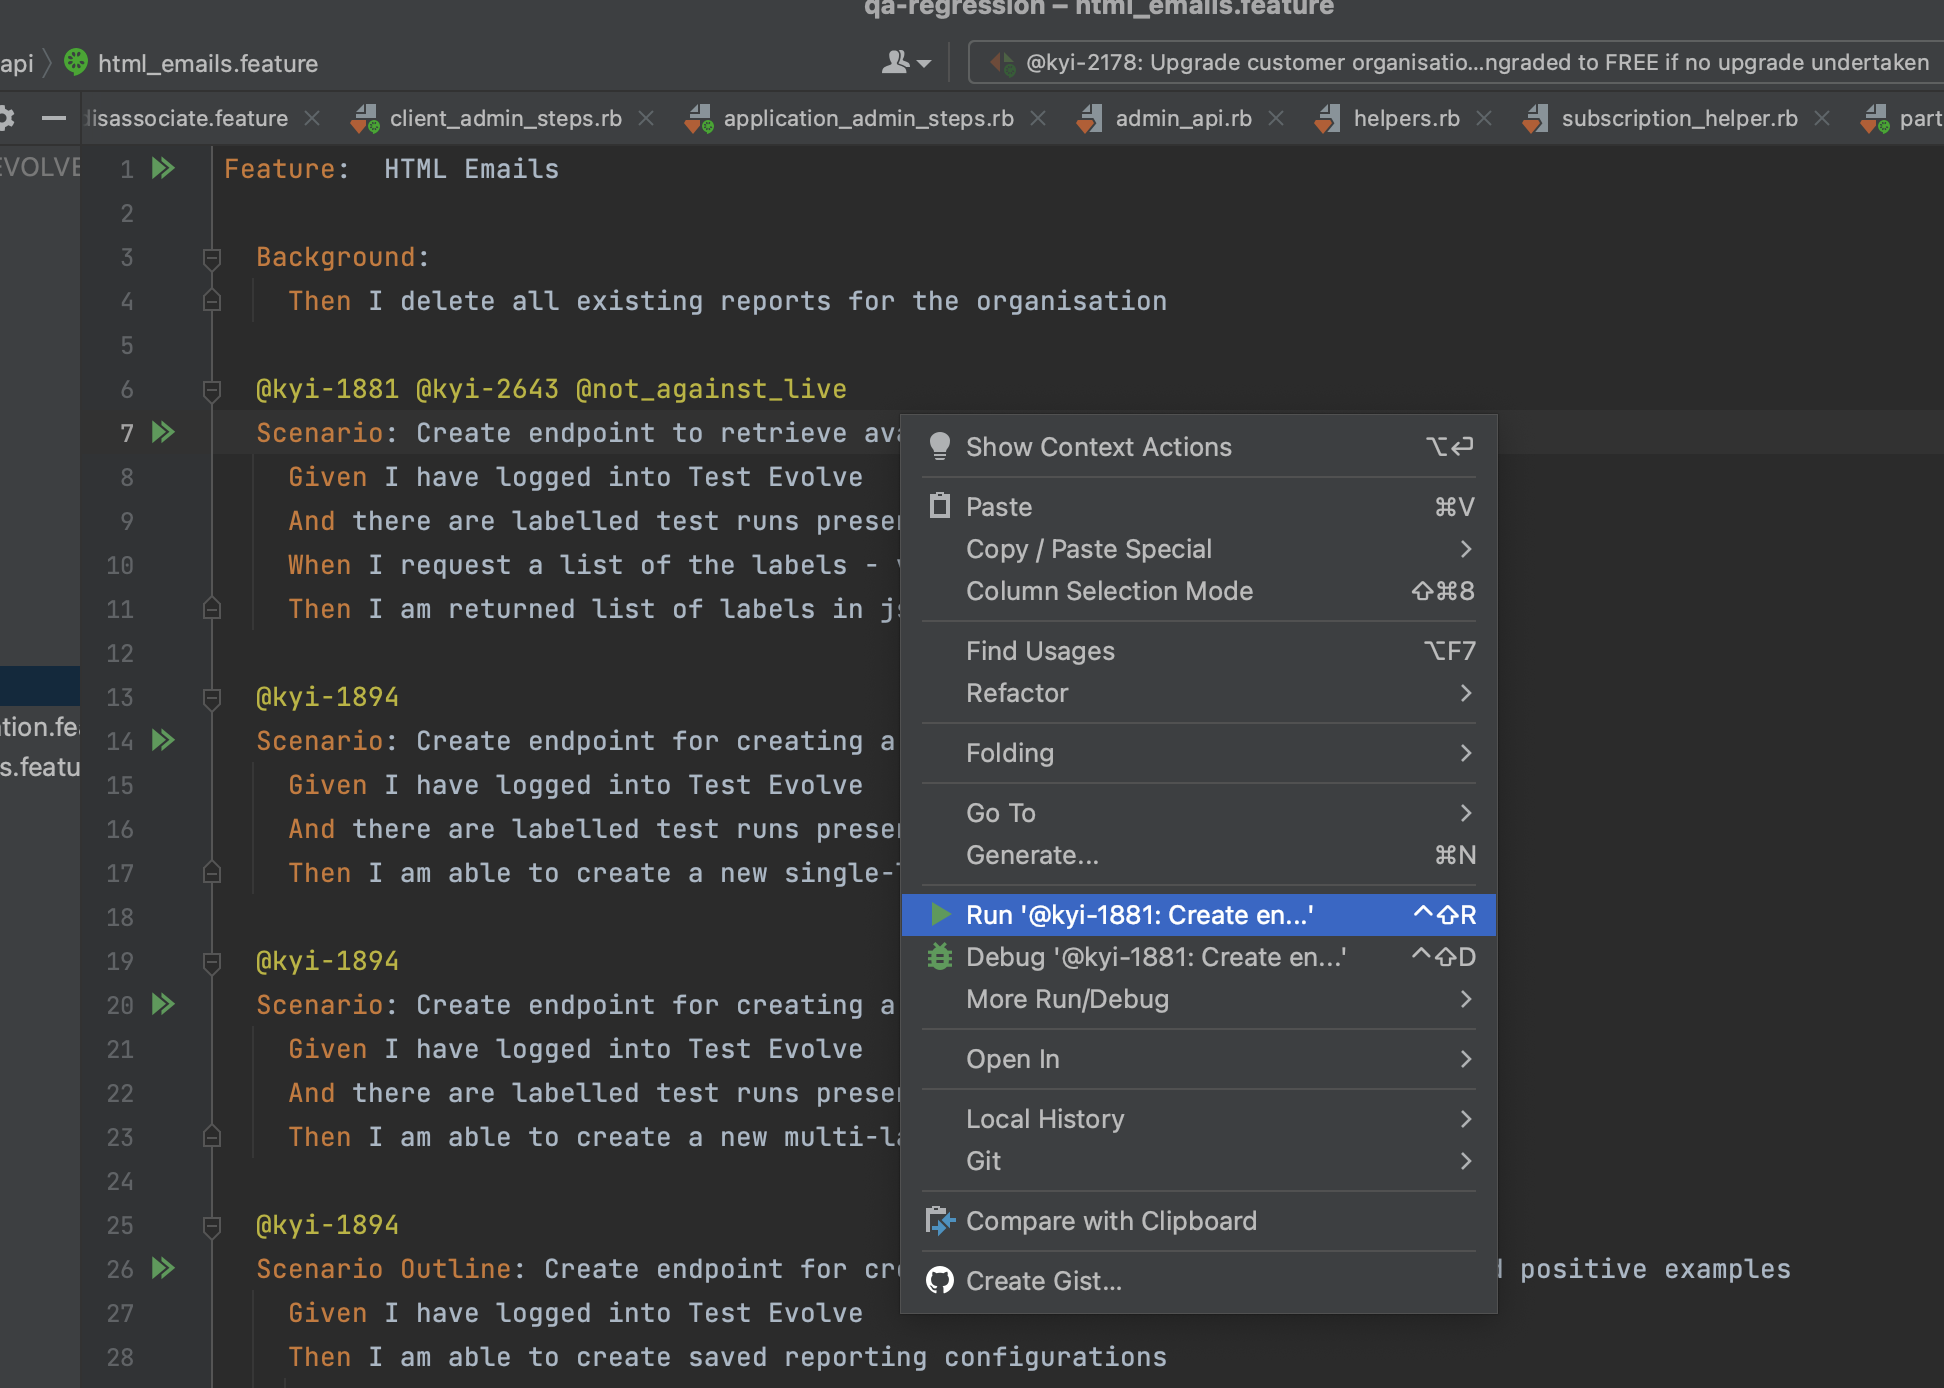
If you use Rubymine, running tests directly from the IDE is as simple as hovering over the Feature or Scenario in question and right clicking and selecting 'Run'.
From the command line
If you are not using Rubymine or prefer to use command line prompts to run your tests, open a terminal session at the root of your automation project. Choose one of the following commands based upon your language, operating system and tags (to include tests) that you wish to run.
- Ruby
- JavaScript
- TypeScript
cucumber features -t '@your_tags'
npm run test -- --tags '@your_tags'             (macOS/Linux)

npm run test:windows -- --tags '@your_tags'     (Windows)
npm run test -- --tags '@your_tags'             (macOS/Linux)

npm run test:windows -- --tags '@your_tags'     (Windows)
3c) Finding and Organising your Test Results in Halo (Managing Labels)
Manage your use of labels for test runs in order to send your test results to your specified navigation/hierarchy node as detailed in 2d(ii)
Step 4. Writing tests for your application
4a) Using the Web Test Recorder to build a first test
If you are now ready to begin creating tests for your own application, you can use the web test recorder as an accelerator for new test creation.
Follow this guide to record your first BDD test.
4b) Implementing a Page Object Model with the Web Test Recorder
Whilst the web test recorder will allow you to record Ruby, JavaScript or TypeScript automation code directly to a Cucumber step definition, we would always recommend implementing a page object model for ease of ongoing code maintenance. The recorder will allow you to manage this directly at the time of recording a new test. Watch our tutorial on implementing the page object model with the web test recorder here.